Quickstart
Use this page when you want the shortest practical path to a working RocketAiFlow workflow.
The goal is to validate one real path, review the result, and confirm that the trunk, agent, call records, and monitoring are working before you expand the setup.
Complete the common setup first, then follow either the inbound path or the outbound path for the first test.
Before you start
Before you start, prepare only what is needed for the first test:
- a Deepgram API key for the agent voice setup
- SIP trunk credentials when you want to test real inbound or outbound calls
- for outbound, one contact to add manually or a small CSV file to import after the campaign is created
Choose one path
Choose what you want to validate first. You do not need to complete both paths for the first quickstart run.
Inbound: Inbound AiAI Inbound Routing when an incoming call should reach the agent.
Outbound: AI Dialer FlowsDialer Campaigns when a campaign should call contacts.
Common setup
Configure the shared parts once: trunk, agent, prompt, optional functions, and a direct Phone test. After that, continue with AI Inbound Routing for inbound or Dialer Campaigns for outbound.
1. Configure and verify the trunk
Inbound routing and outbound campaigns depend on a configured trunk. For a quick setup, focus on the parts that make the trunk usable: Trunk Configuration, Registration, Auth, and Trunk Status.
Follow the screens in this order:
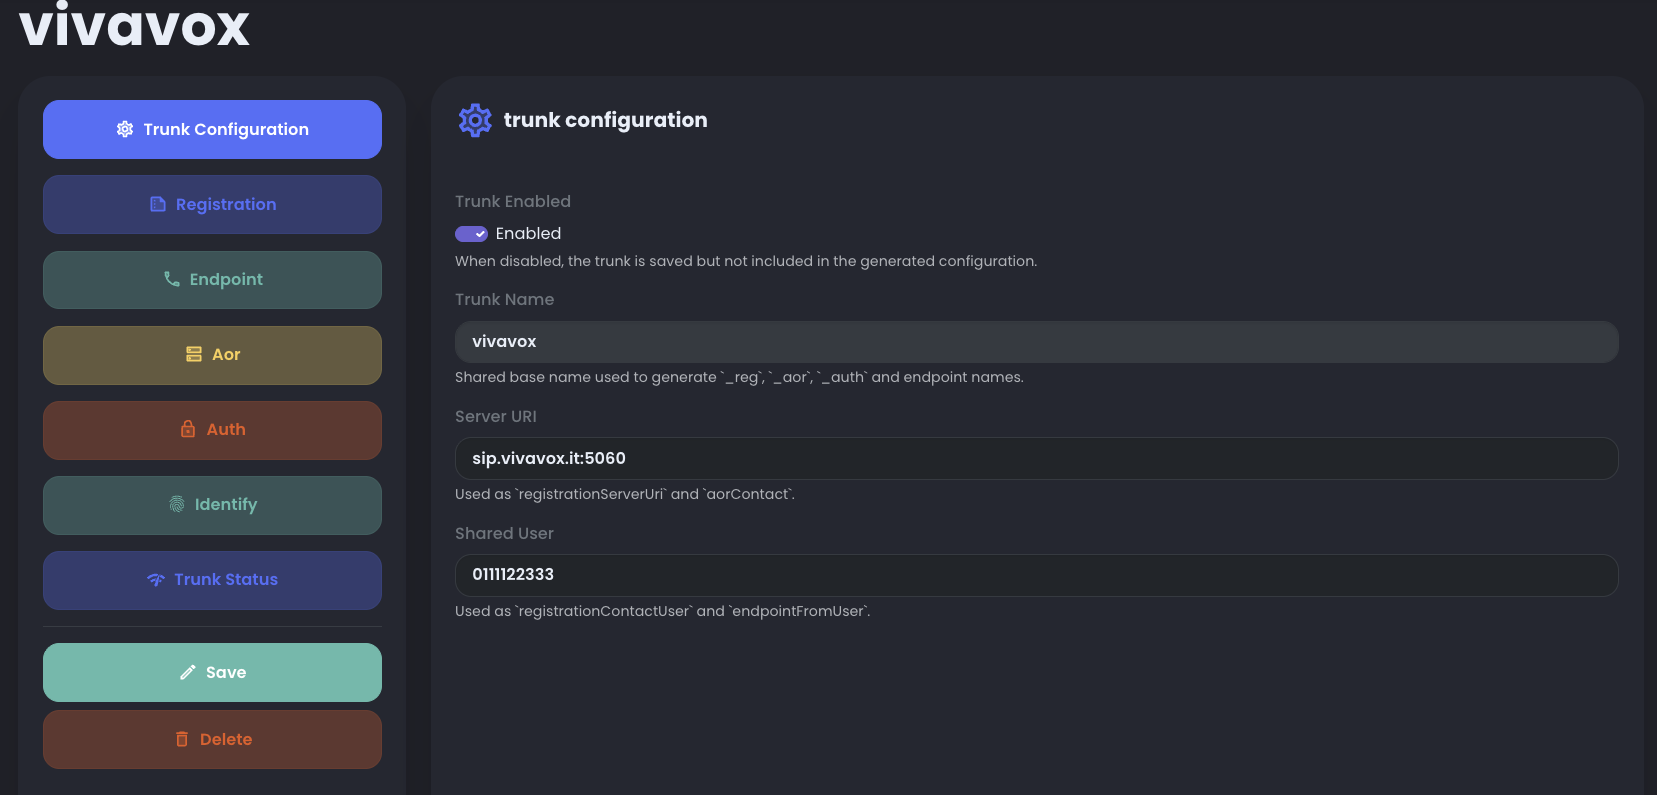
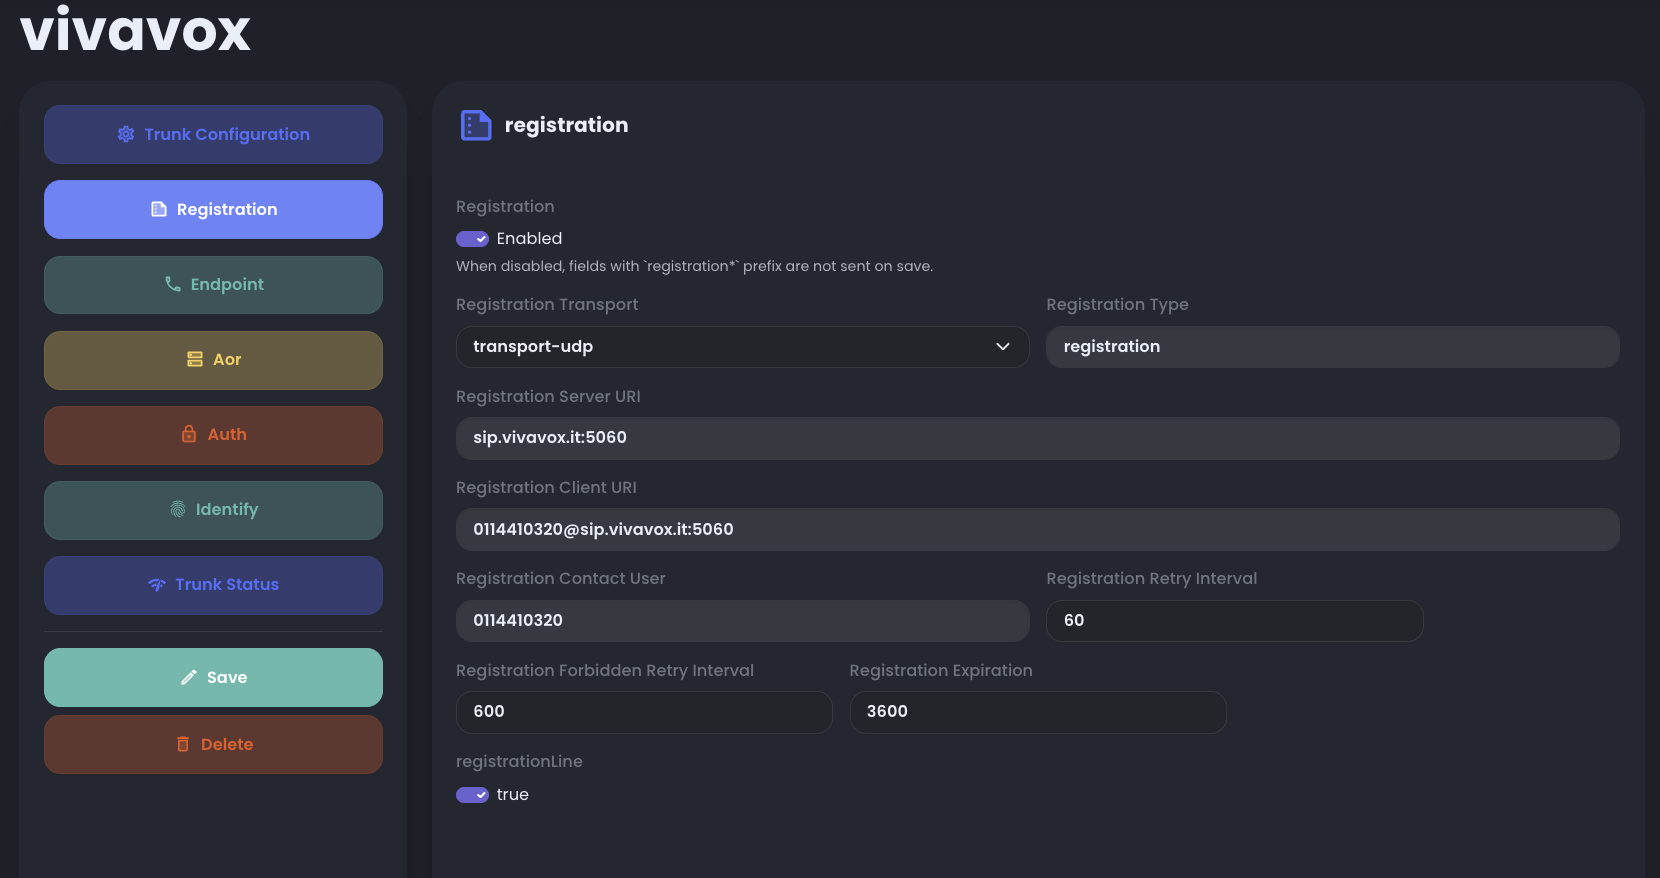
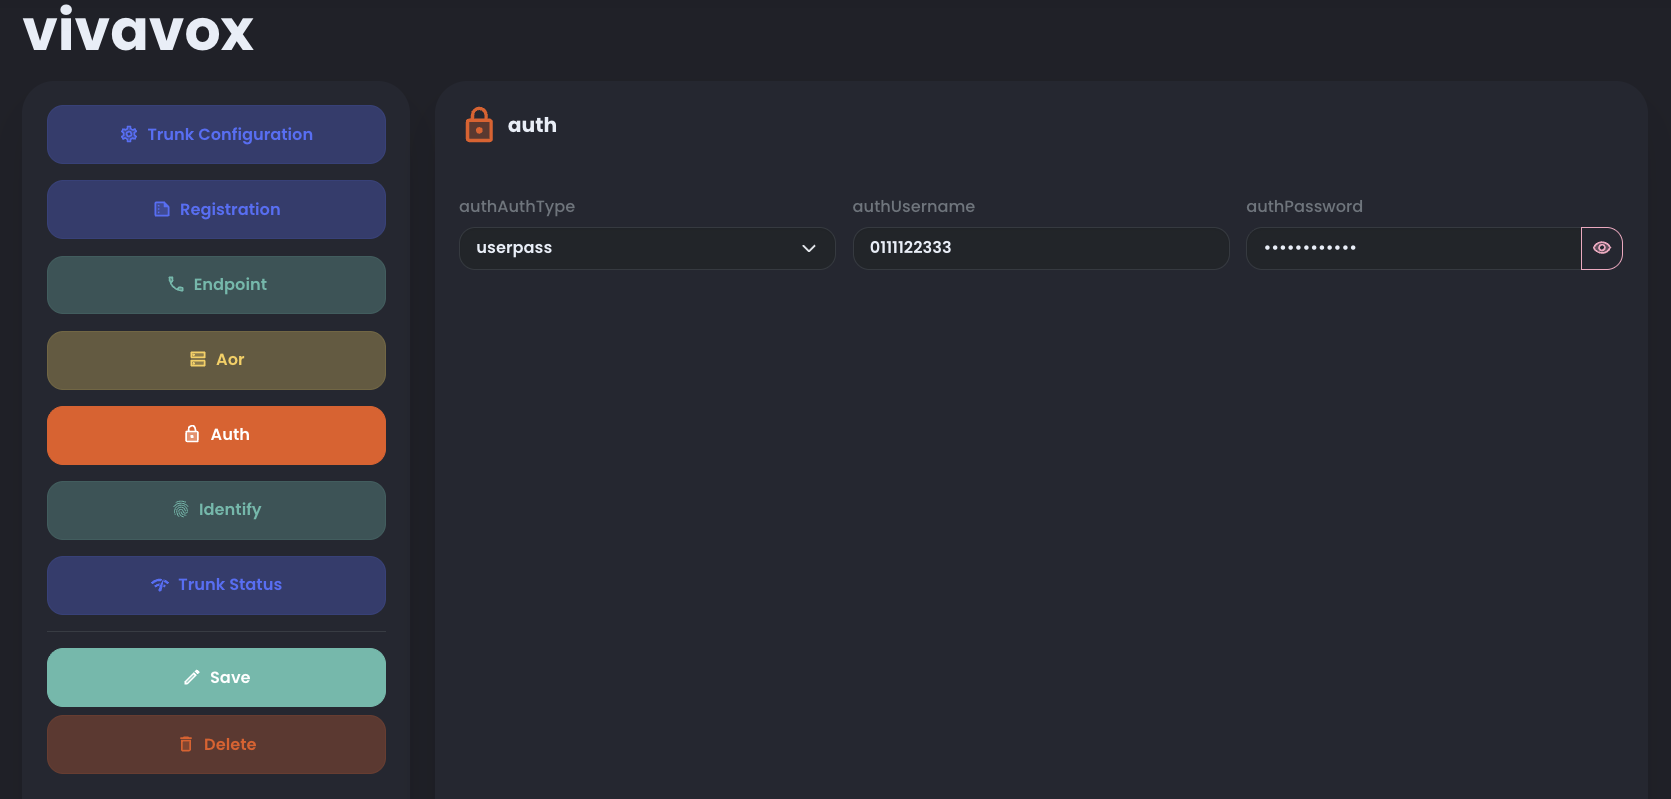
userpass, then enter the username and password used to register with the provider.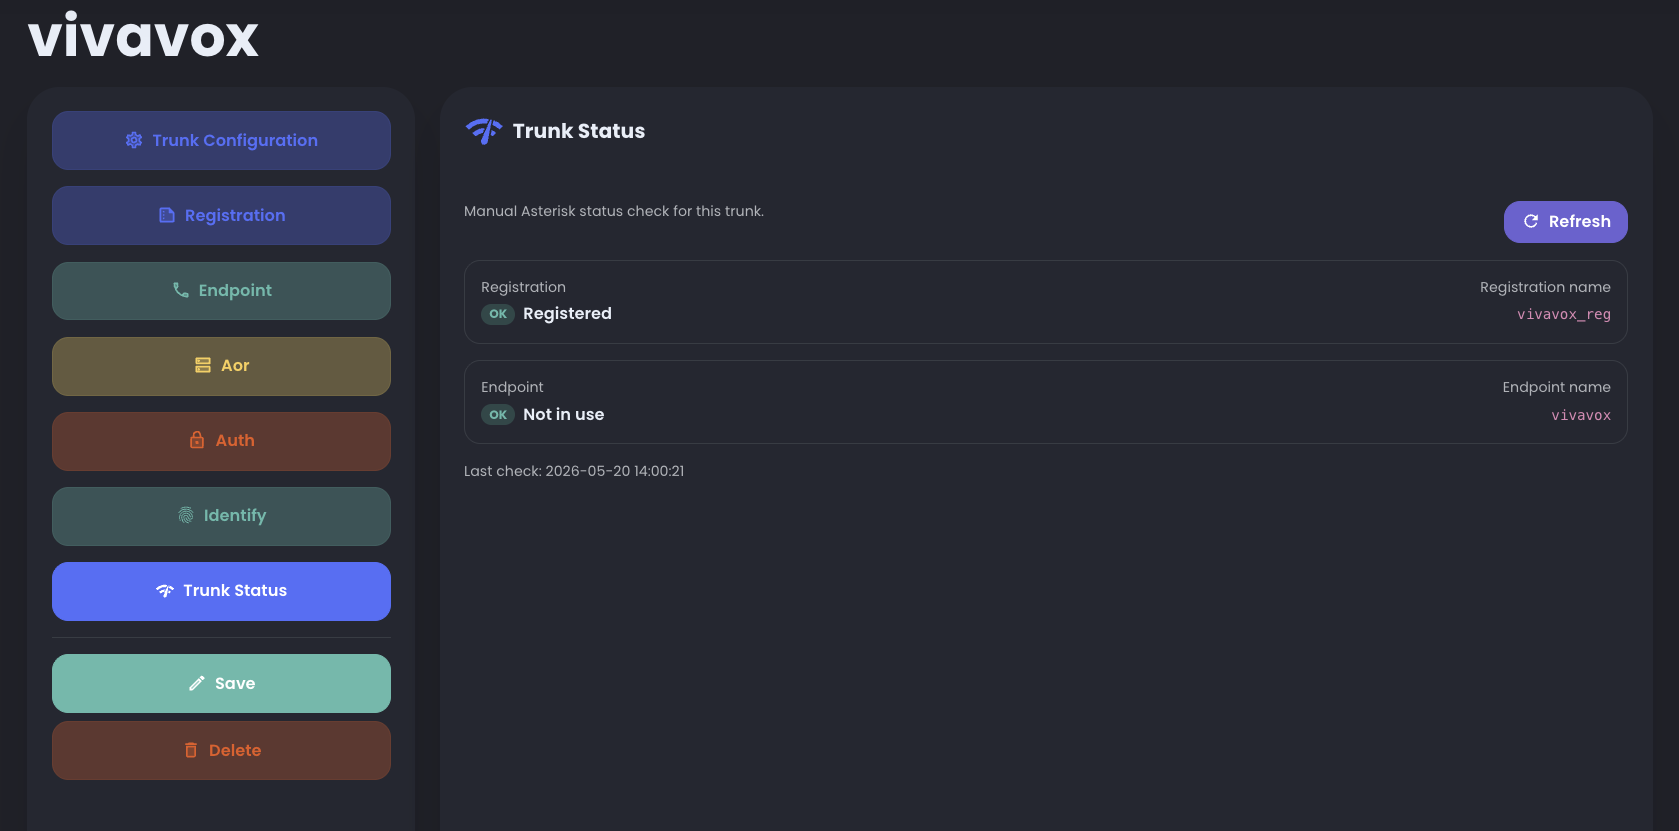
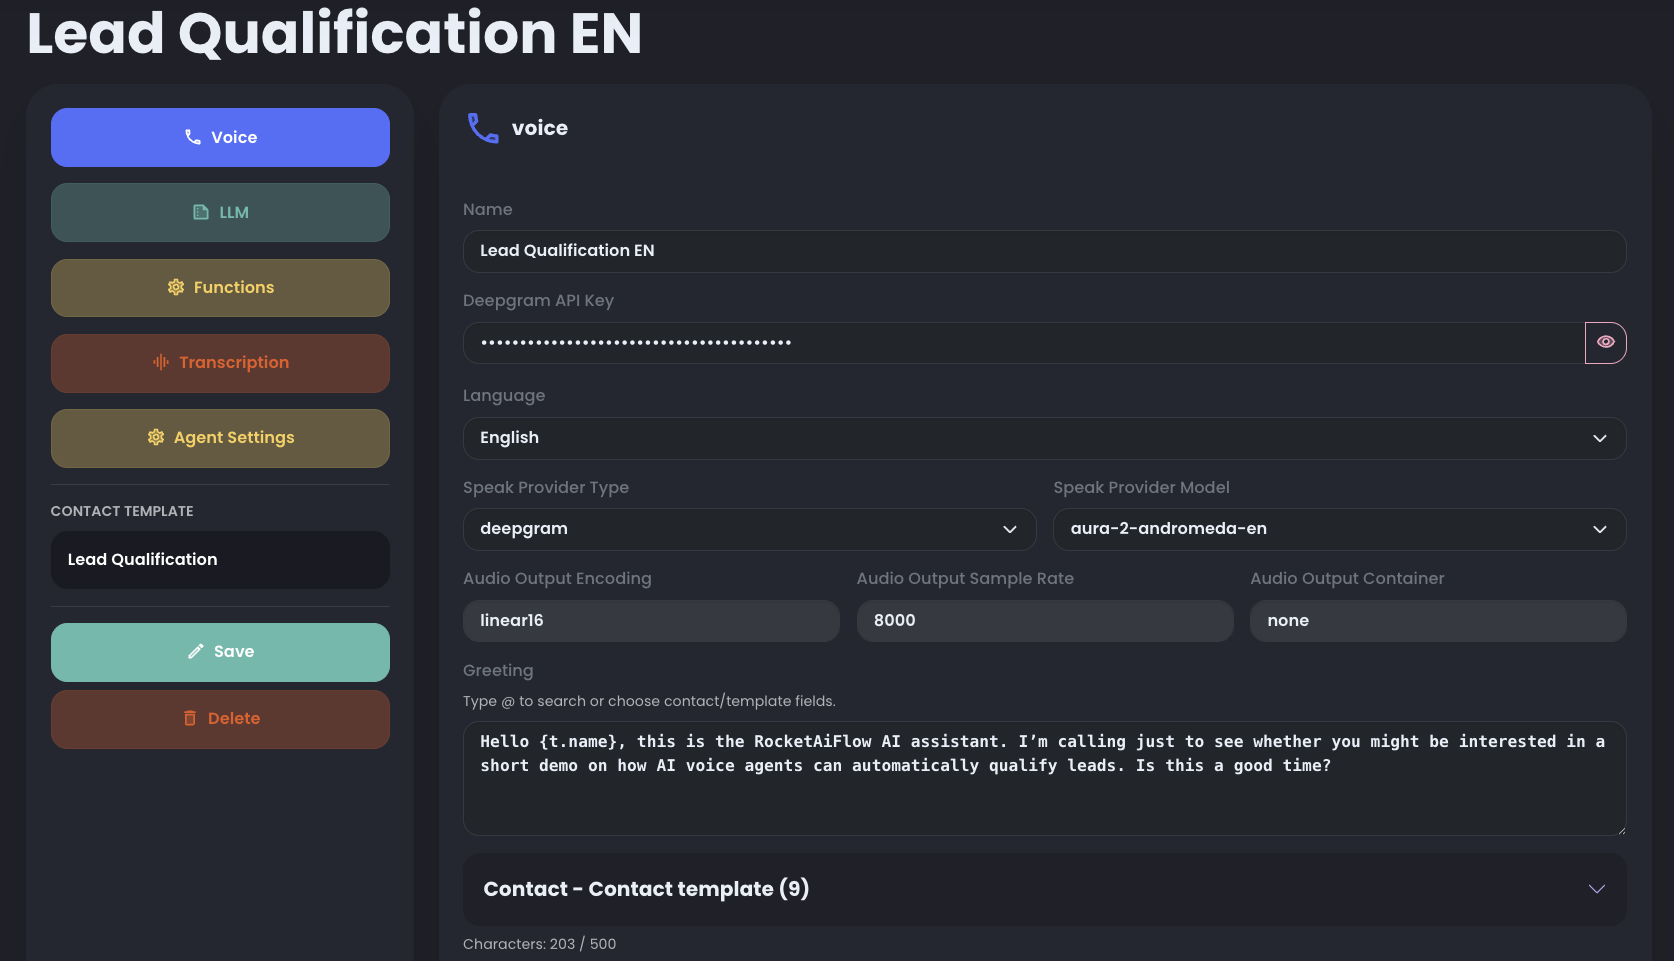
2. Create the first agent
Create one agent with a clear goal, such as lead qualification, appointment intake, or routing to a human team.
To quickly test voices and languages, choose the language and voice provider, then write a short greeting message. The greeting is the first message the agent says during the call.
For voice, LLM, transcription, functions, templates, and advanced Agent settings, see Create Your First AI Voice Agent.
RocketAiFlow includes two preconfigured examples, Lead Qualification IT and Lead Qualification EN. Use them as starting examples, not production-ready agents. If you want to test a ready-made agent immediately, go to Phone.
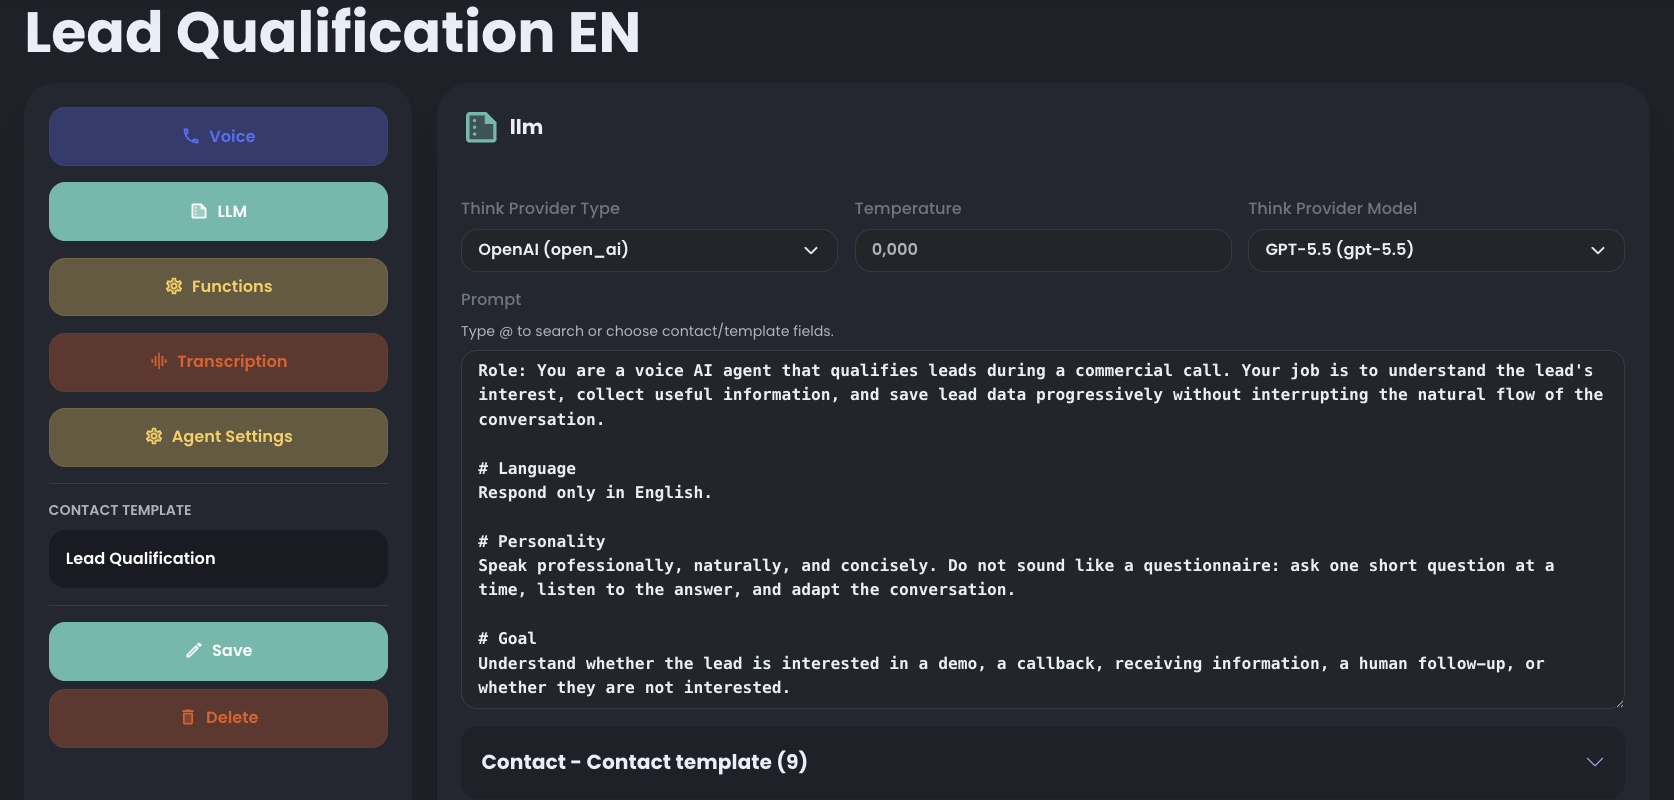
3. Configure the prompt
For the quickstart, the LLM prompt can stay minimal. Explain who the agent is, what it should do, and when it should stop or transfer the call.
If you use a preconfigured agent, the prompt is already included. For a detailed prompt structure, see Configure Agent Prompt.
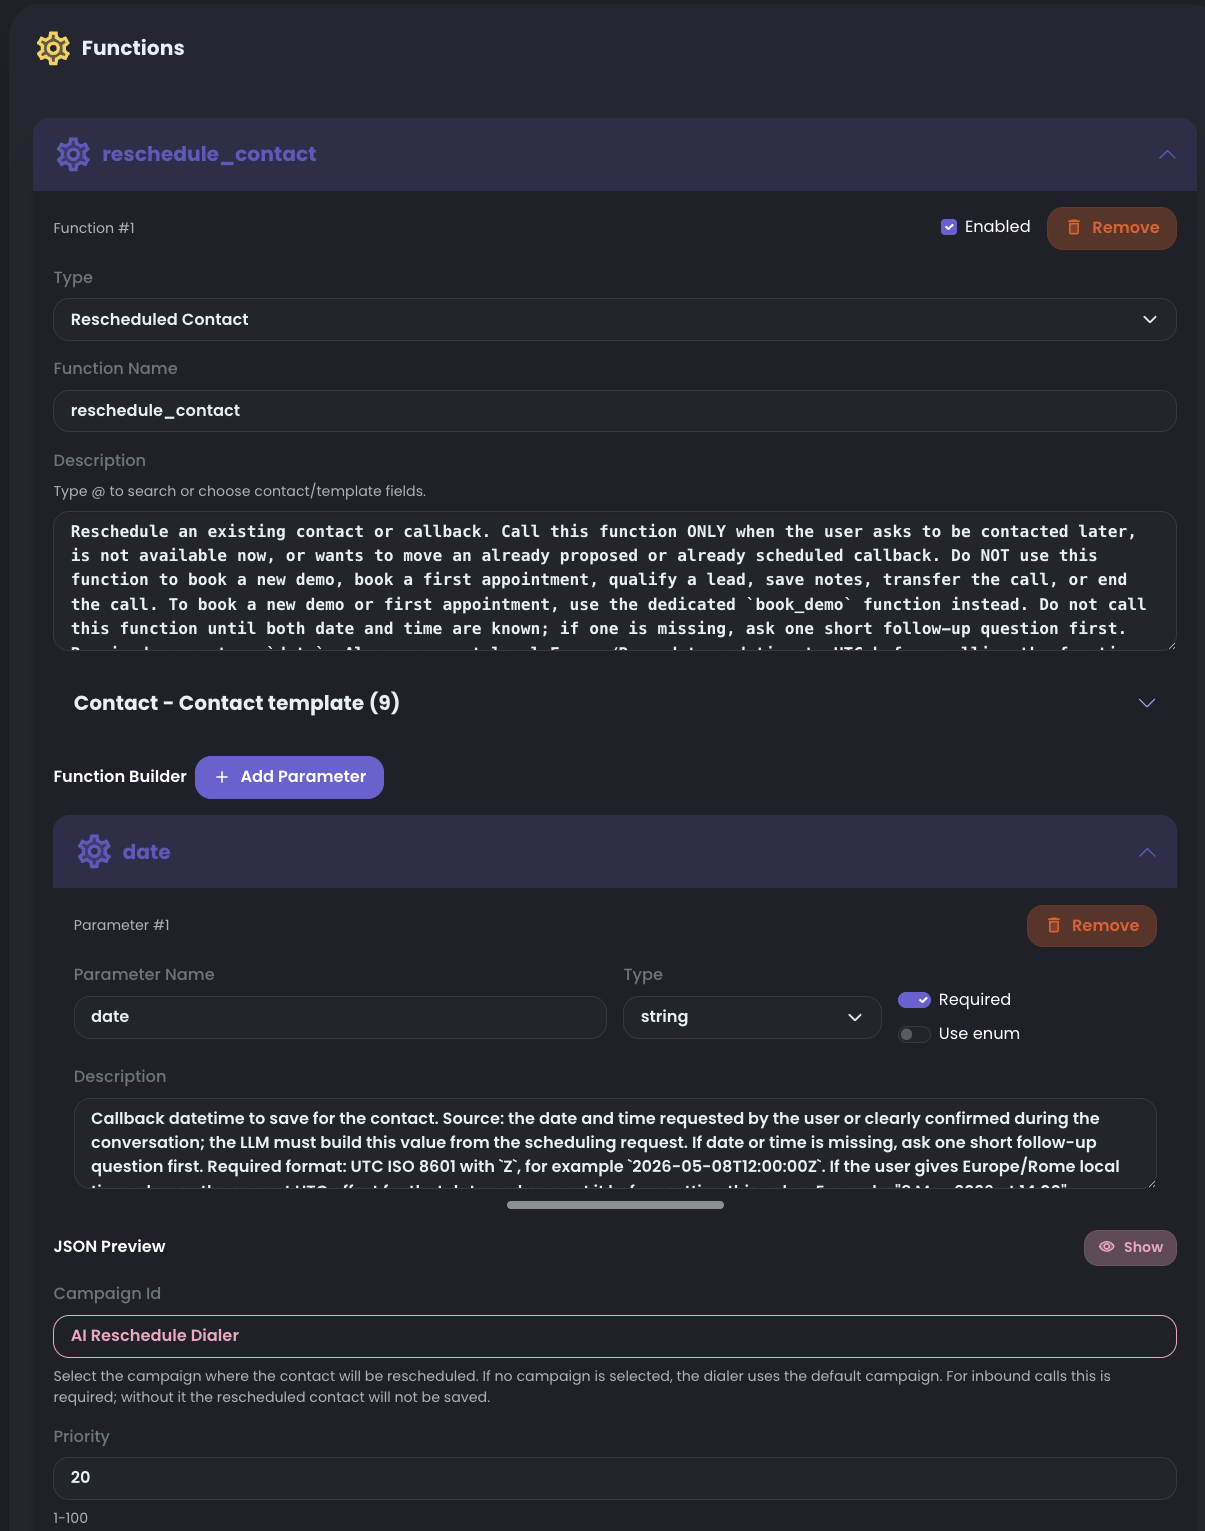
4. Optional functions
Optional. Use functions only when the agent must perform an action: transfer a call, reschedule a contact, save lead data, or call an external API.
For this quickstart, you can skip them. To configure actions properly, see Add Functions.
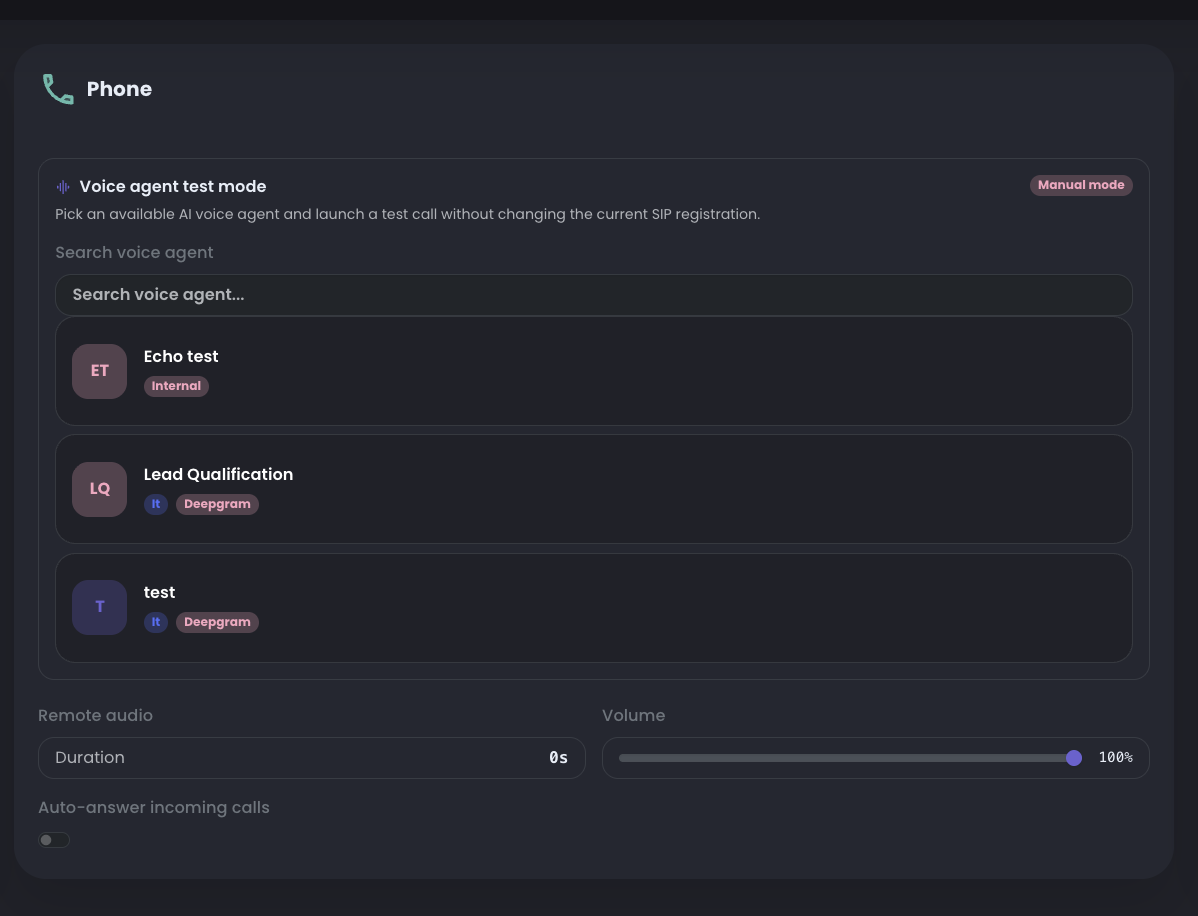
Test the agent with Phone
After configuring the agent, test it from the Phone section.
Phone is a WebRTC client that can register SIP users, place and receive calls, and run a direct AI voice agent test. For this quickstart, use Voice agent test mode to simulate an inbound-style call to the agent without depending on trunk routing.
- open Phone
- enter the password for the default SIP/WebRTC user
2000 - select the agent you created in Voice agent test mode
- start the call and check that the agent responds as expected
Inbound quickstart flow
Use this flow when the phone number on the inbound trunk should route incoming calls to the agent.
You can also set a concurrency limit. When the limit is reached, additional incoming calls are rejected and the caller hears the number as busy.
- the inbound trunk is configured and registered
- the agent exists with prompt and required functions
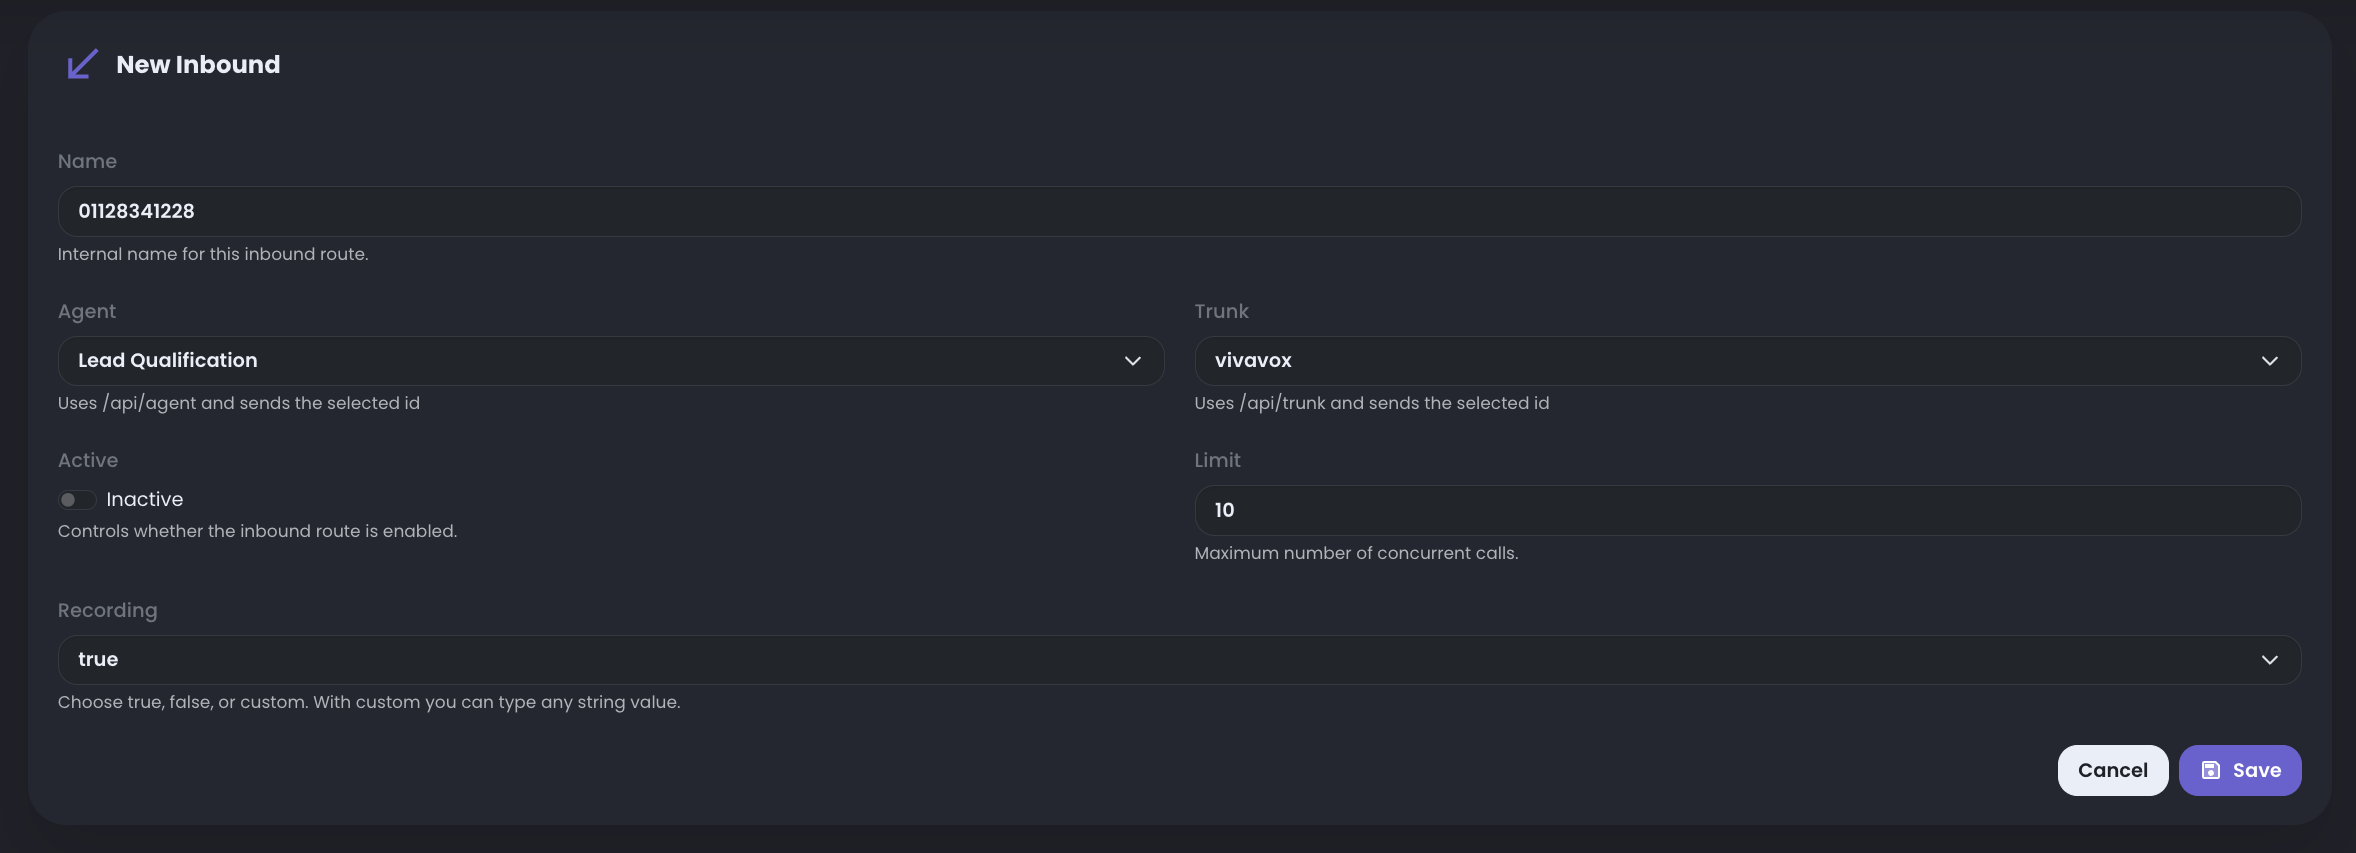
5A. Create AI Inbound Routing
Path to follow: Inbound AiAI Inbound RoutingAdd Inbound Then select only:
- the agent you created
- the trunk you created
- whether the inbound route should be active
- the maximum number of concurrent calls this agent can handle on the route
6A. Run an inbound test call
Call the phone number connected to the configured trunk and verify that the inbound route sends the call to the expected agent.
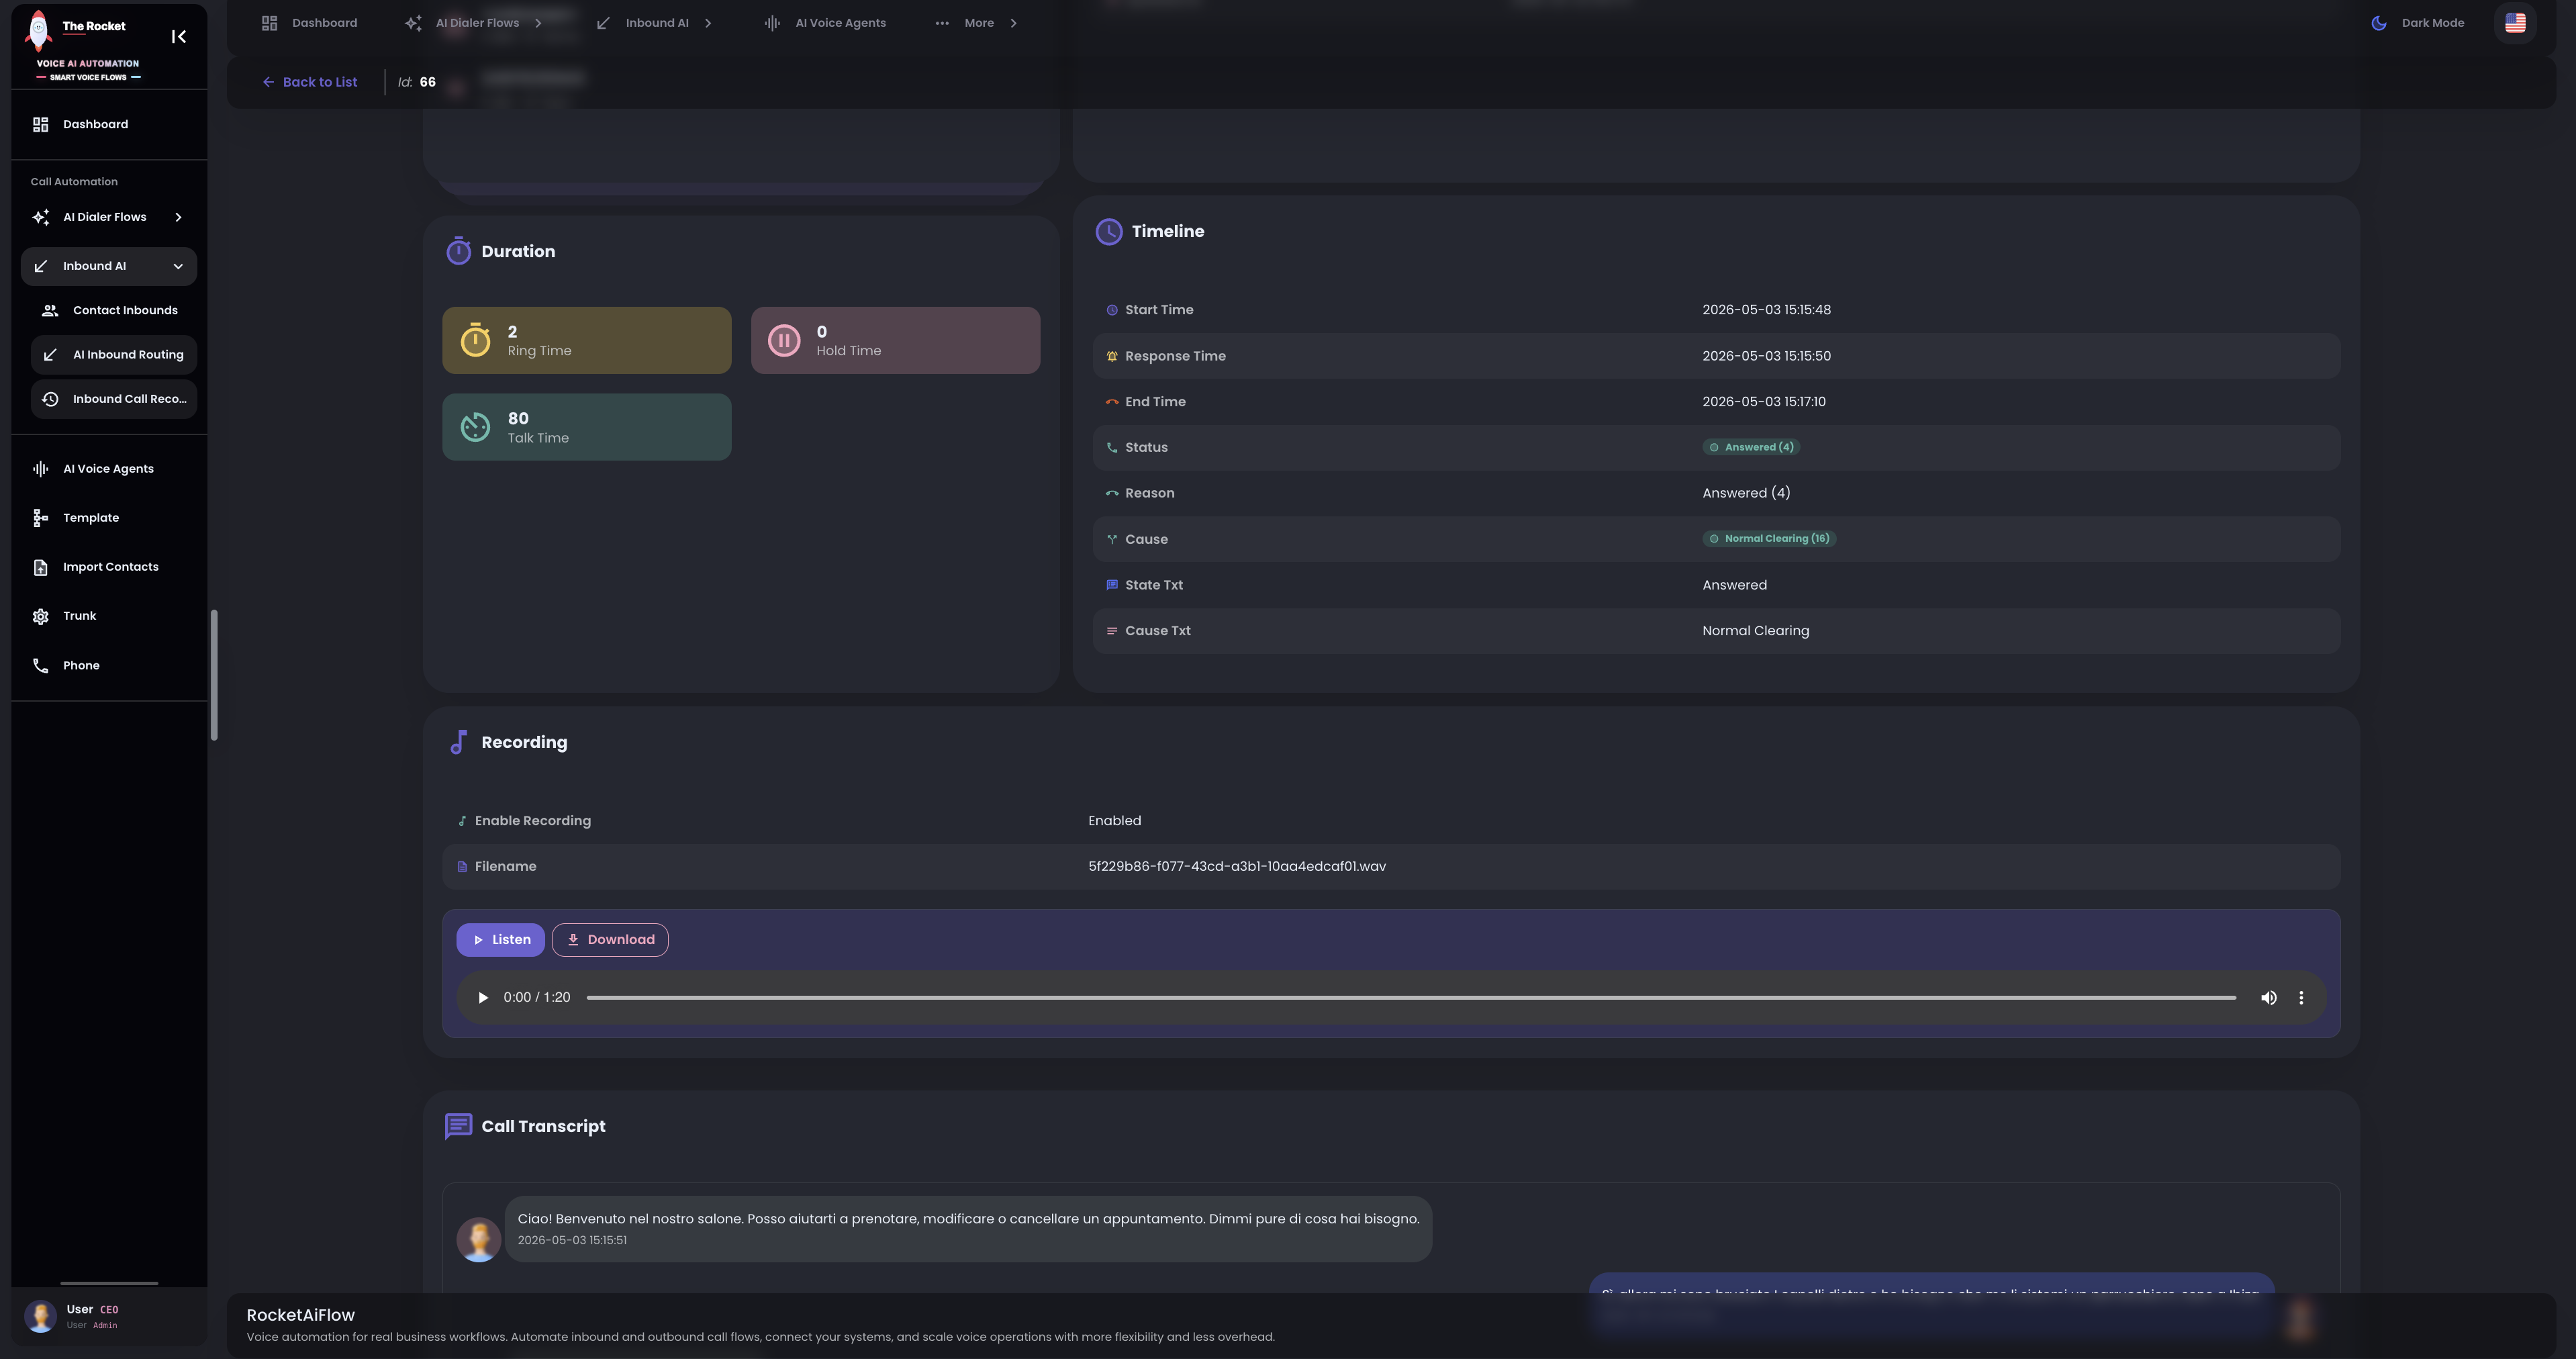
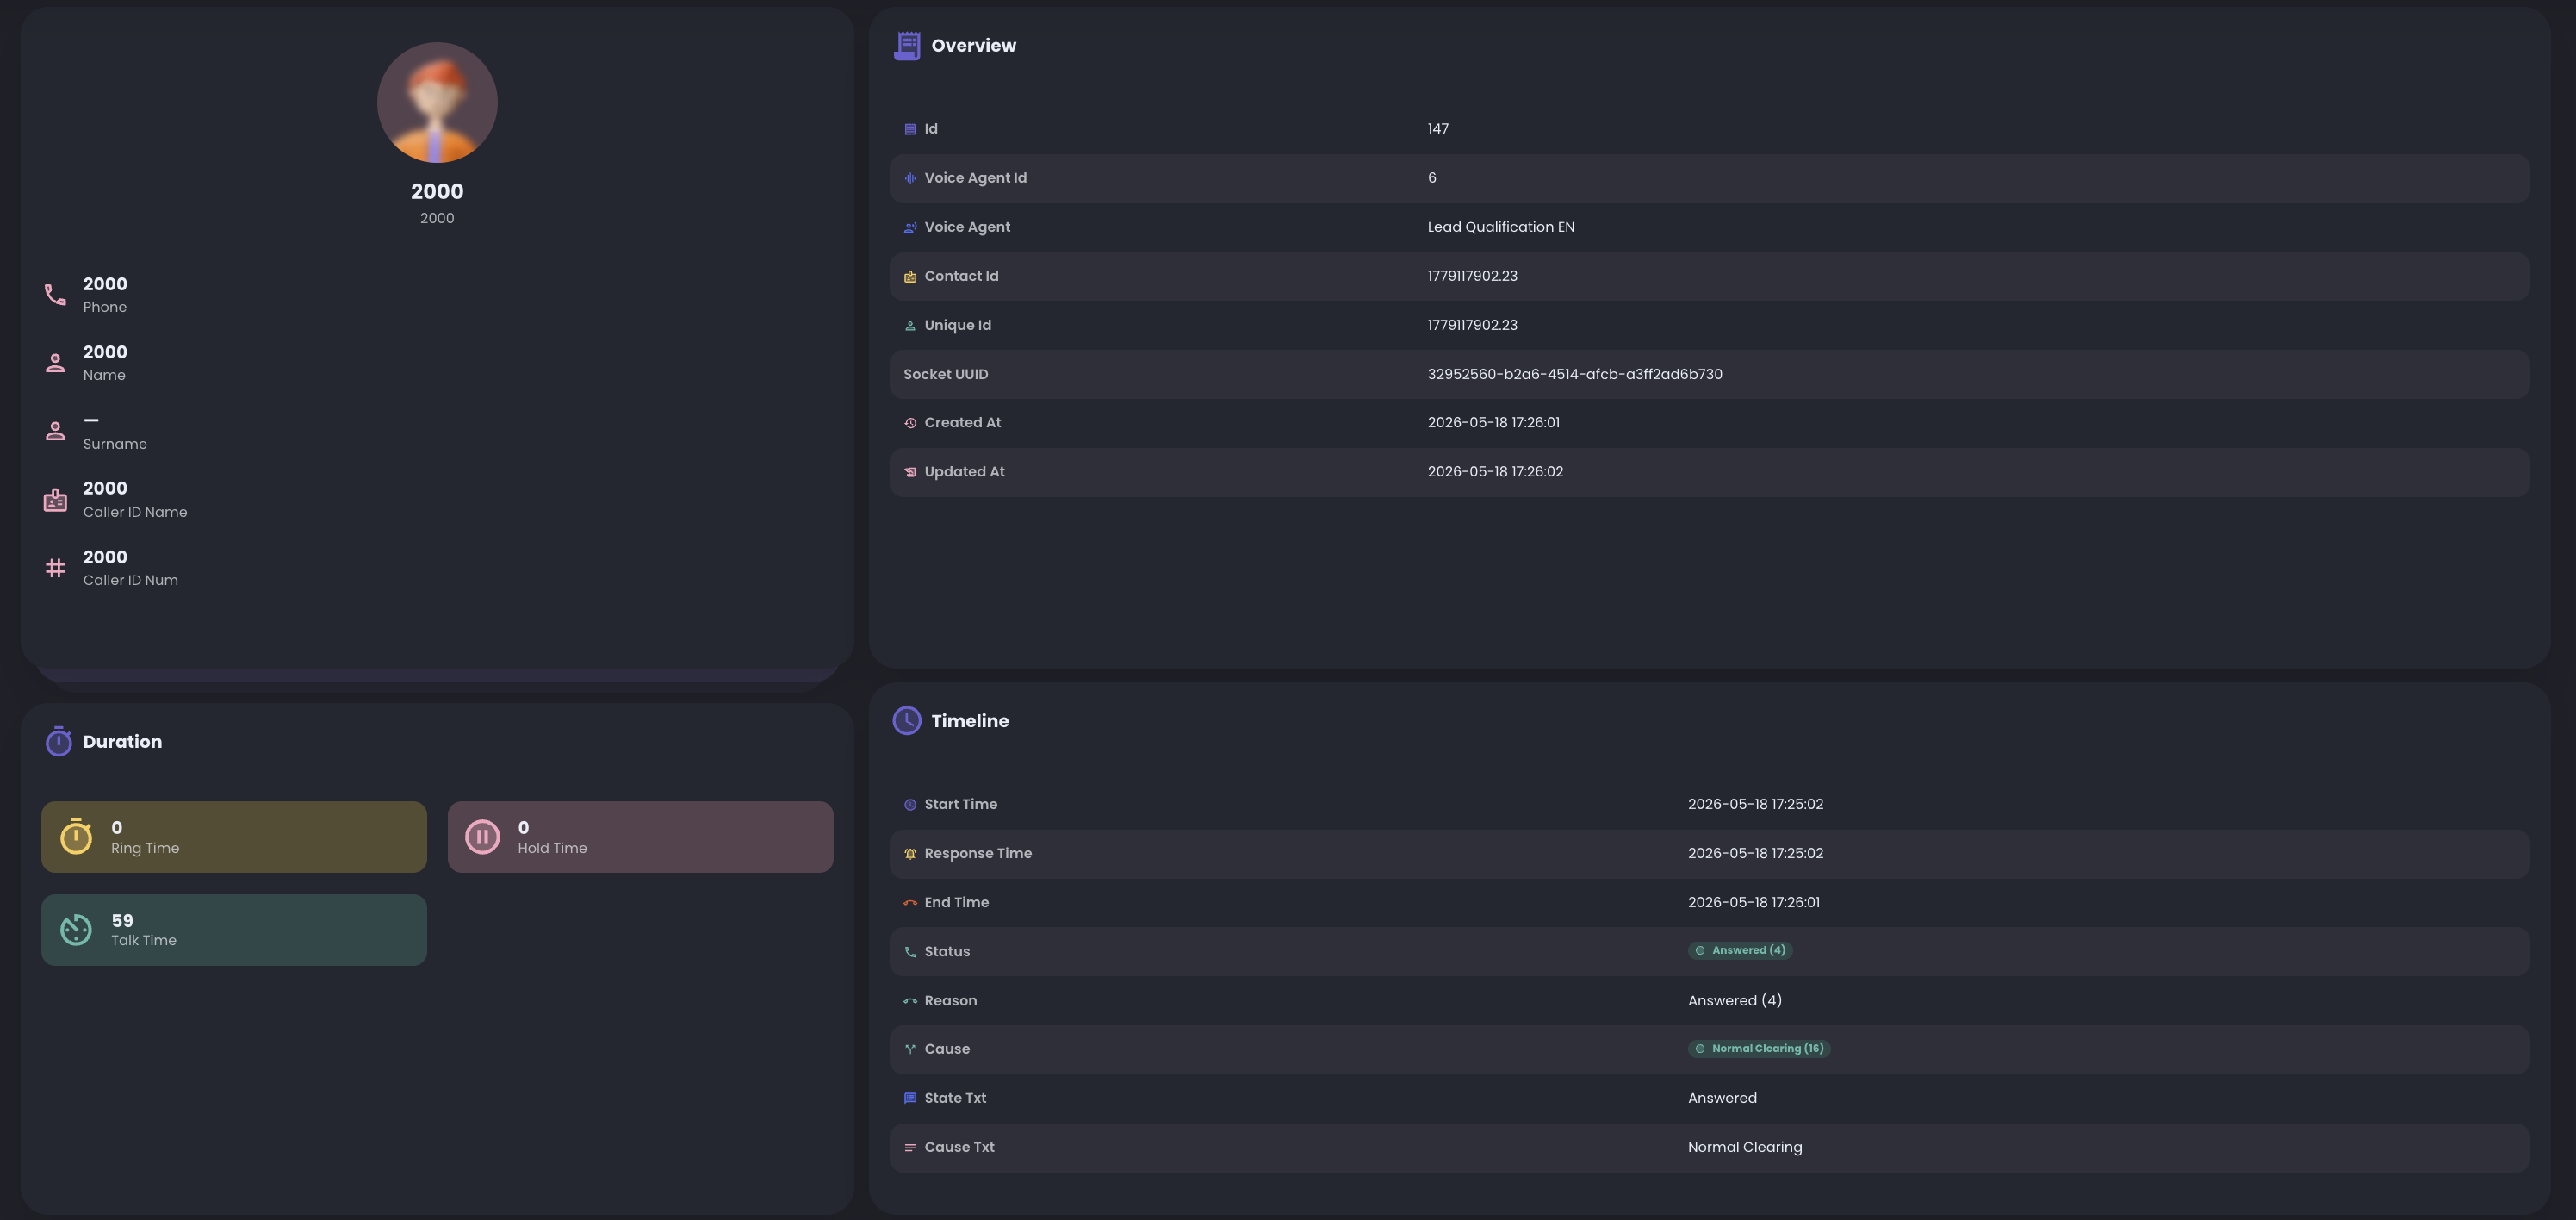
7A. Review the inbound result
After the test, open the Inbound Call Record and check the values saved for that call based on the options you selected. You can review the call transcript, recording when enabled, and timing data.
Outbound quickstart flow
Use this path when the first workflow should place calls from a campaign against a controlled contact list.
Start this flow only after:
- the outbound trunk path is configured and registered
- the agent exists
- the prompt and required functions are attached to the agent
- a contact CSV is ready or one contact can be added manually to the campaign
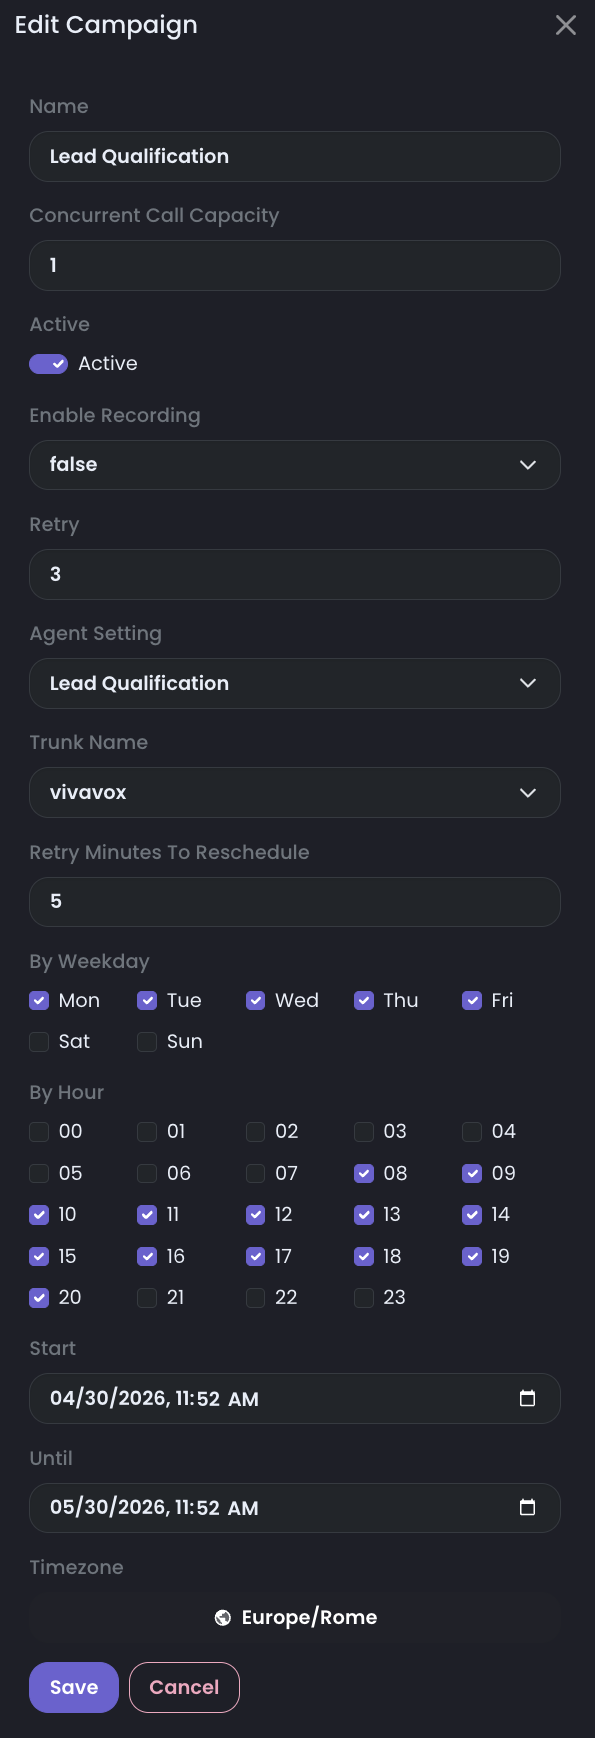
5B. Create a first outbound campaign
Path to follow: AI Dialer FlowsDialer CampaignsAdd Campaigns Then configure a simple campaign for the first test:
- select the agent you created
- select the trunk you created
- select the campaign timezone
- set Concurrent Call Capacity to 1
- leave Retry Minutes To Reschedule at the default value
- save the campaign before importing contacts, because the import step needs a campaign to attach them to
Contacts are added in the next step because they need an existing campaign to attach to.
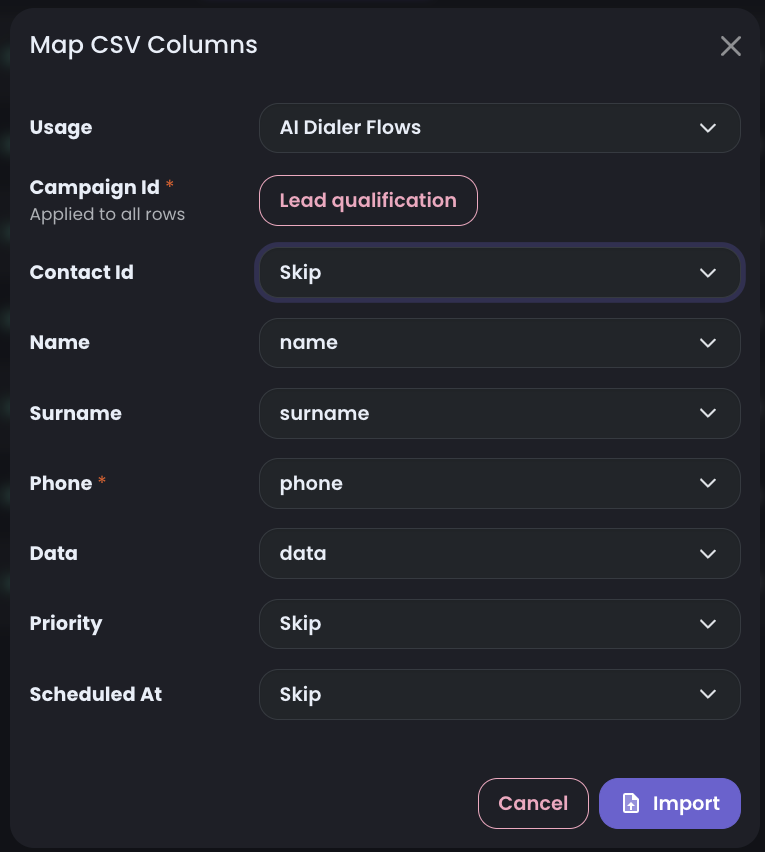
6B. Import contacts
After the campaign is saved, upload a CSV for the outbound campaign and set Usage to AI Dialer Flows. This is required when contacts must be called by the outbound dialer.
Map Phone as the required field. All other contact fields are optional, so keep the first import limited to the values the workflow actually needs:
contactIdif you need to correlate the contact with an external CRM or database recordnameandsurnameif the agent should personalize the conversationdataif you want to pass extra information to the agent during the call, such as city, plan, CRM notes, or lead typepriorityif some contacts should be selected before othersscheduledAtif a contact should become callable only at a specific date and time- custom fields in
datawhen the agent or API action needs business context
Before using the contacts in a campaign, confirm:
- the expected number of contacts was processed
- valid rows were inserted
- failed rows are understood
7B. Run an outbound test call
Start the call and verify the result in Call Records.
After the first test with one contact, decide the campaign pace by selecting how many concurrent calls the campaign should place.
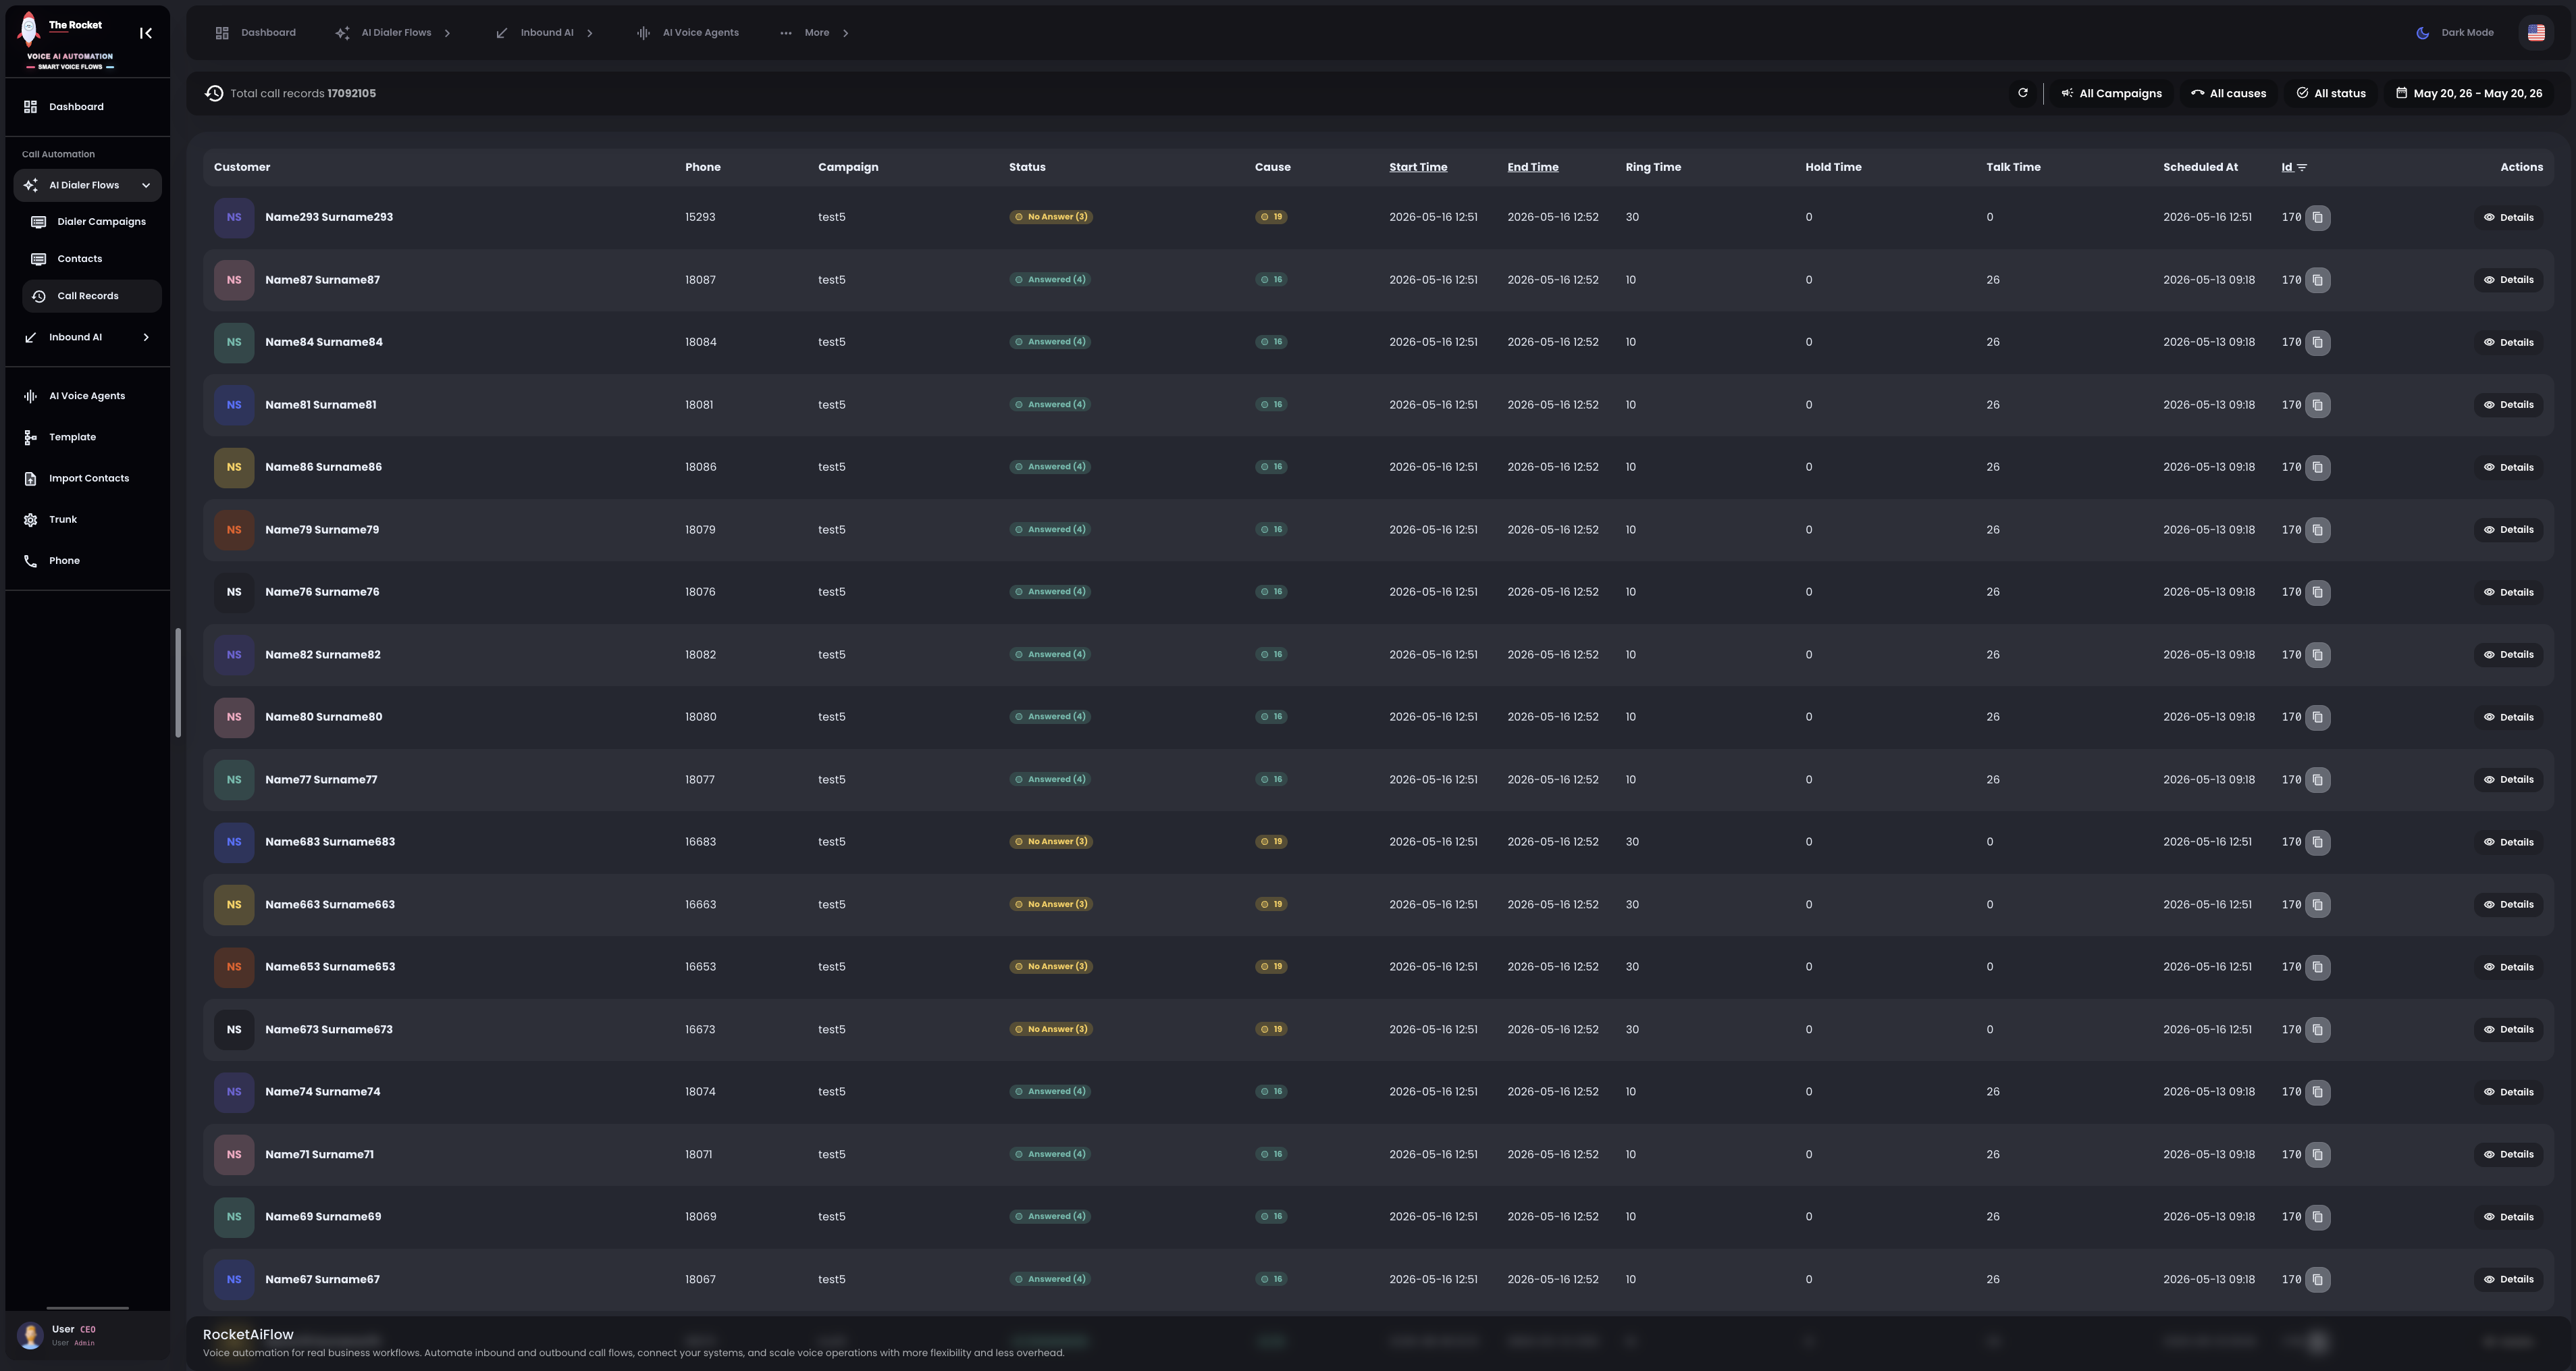
8B. Review outbound records and monitoring
After the test call, open the Call Record and check the outcome, transcript, and timing.
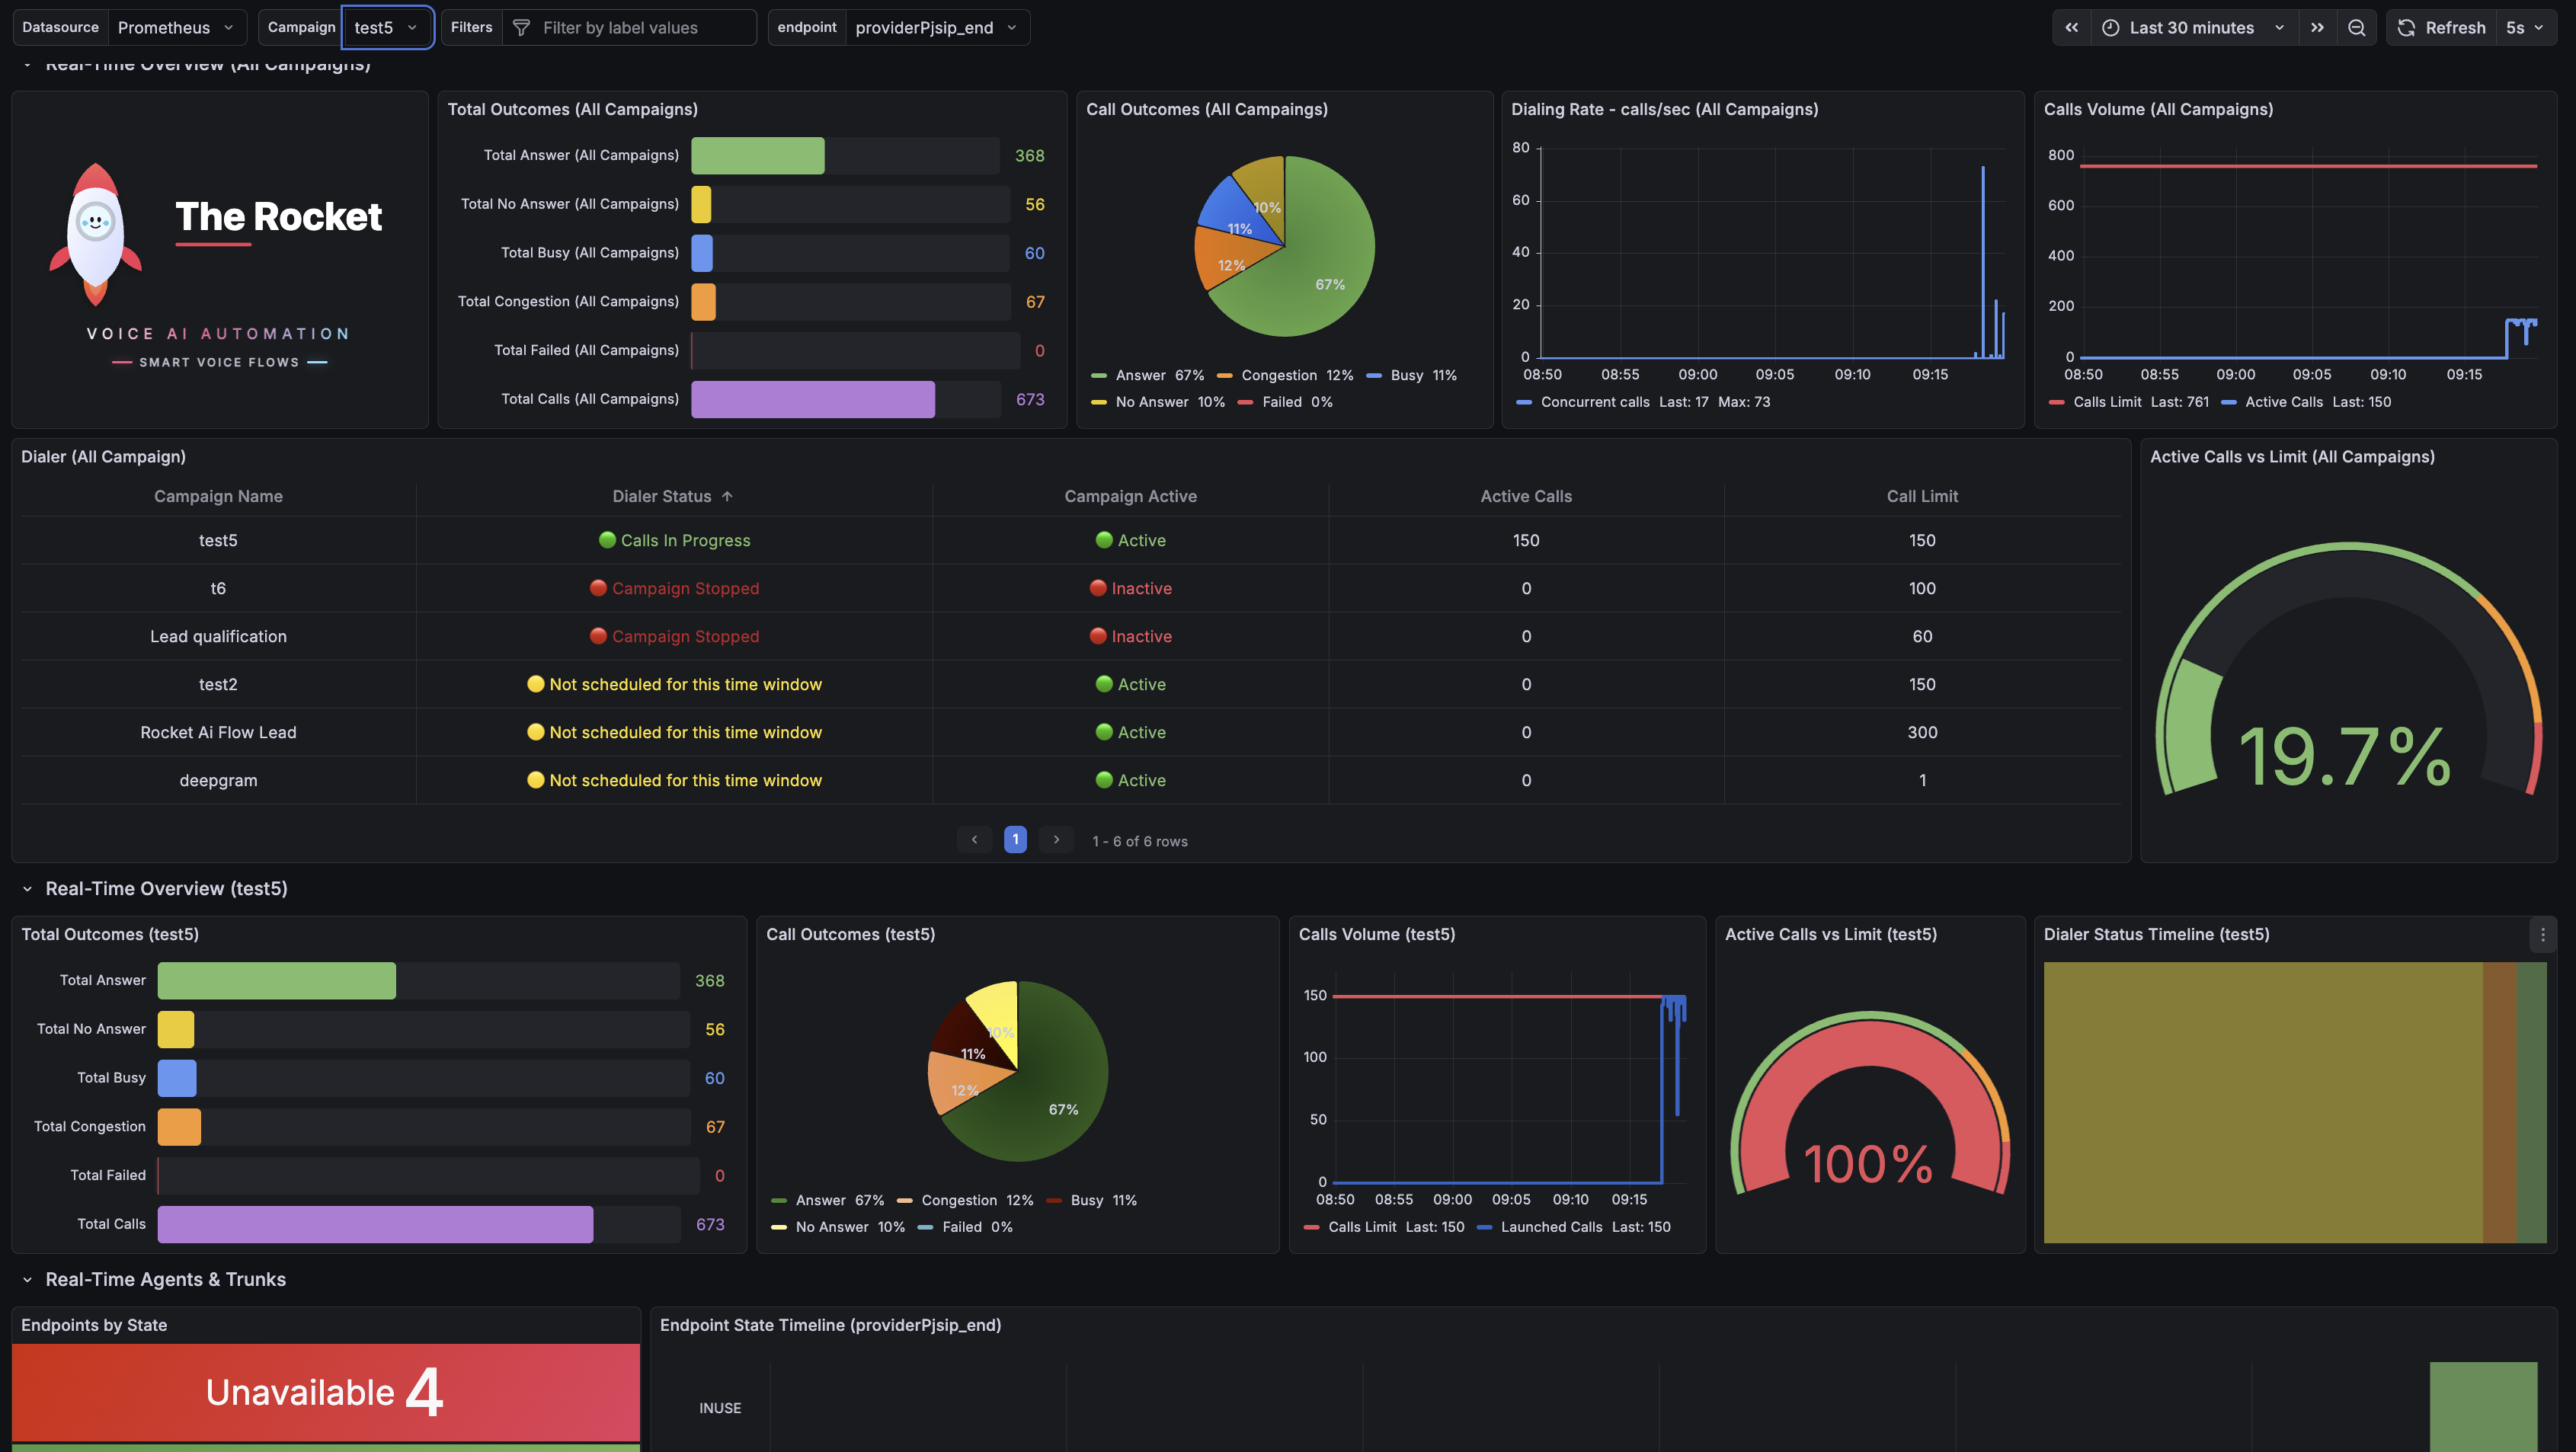
9B. Monitor dashboard and performance
Use the Dashboard section to monitor campaign pace, active calls, call limits, dialing rate, and call outcomes in real time.
In Real-Time Agents & Trunks, check the trunk state: Not In Use means the trunk is available, while In Use means calls are running through it.
There is also a performance view for analyzing calls over a selected time range.
All Dialer dashboard panels are described in Dialer Dashboard Panels.
What to check if something goes wrong
If the first test does not behave as expected, open the Troubleshooting page and follow the inbound or outbound checks.
- the trunk shows Registered
- the inbound route or campaign uses the correct agent
- the result appears in Inbound Call Records or Call Records